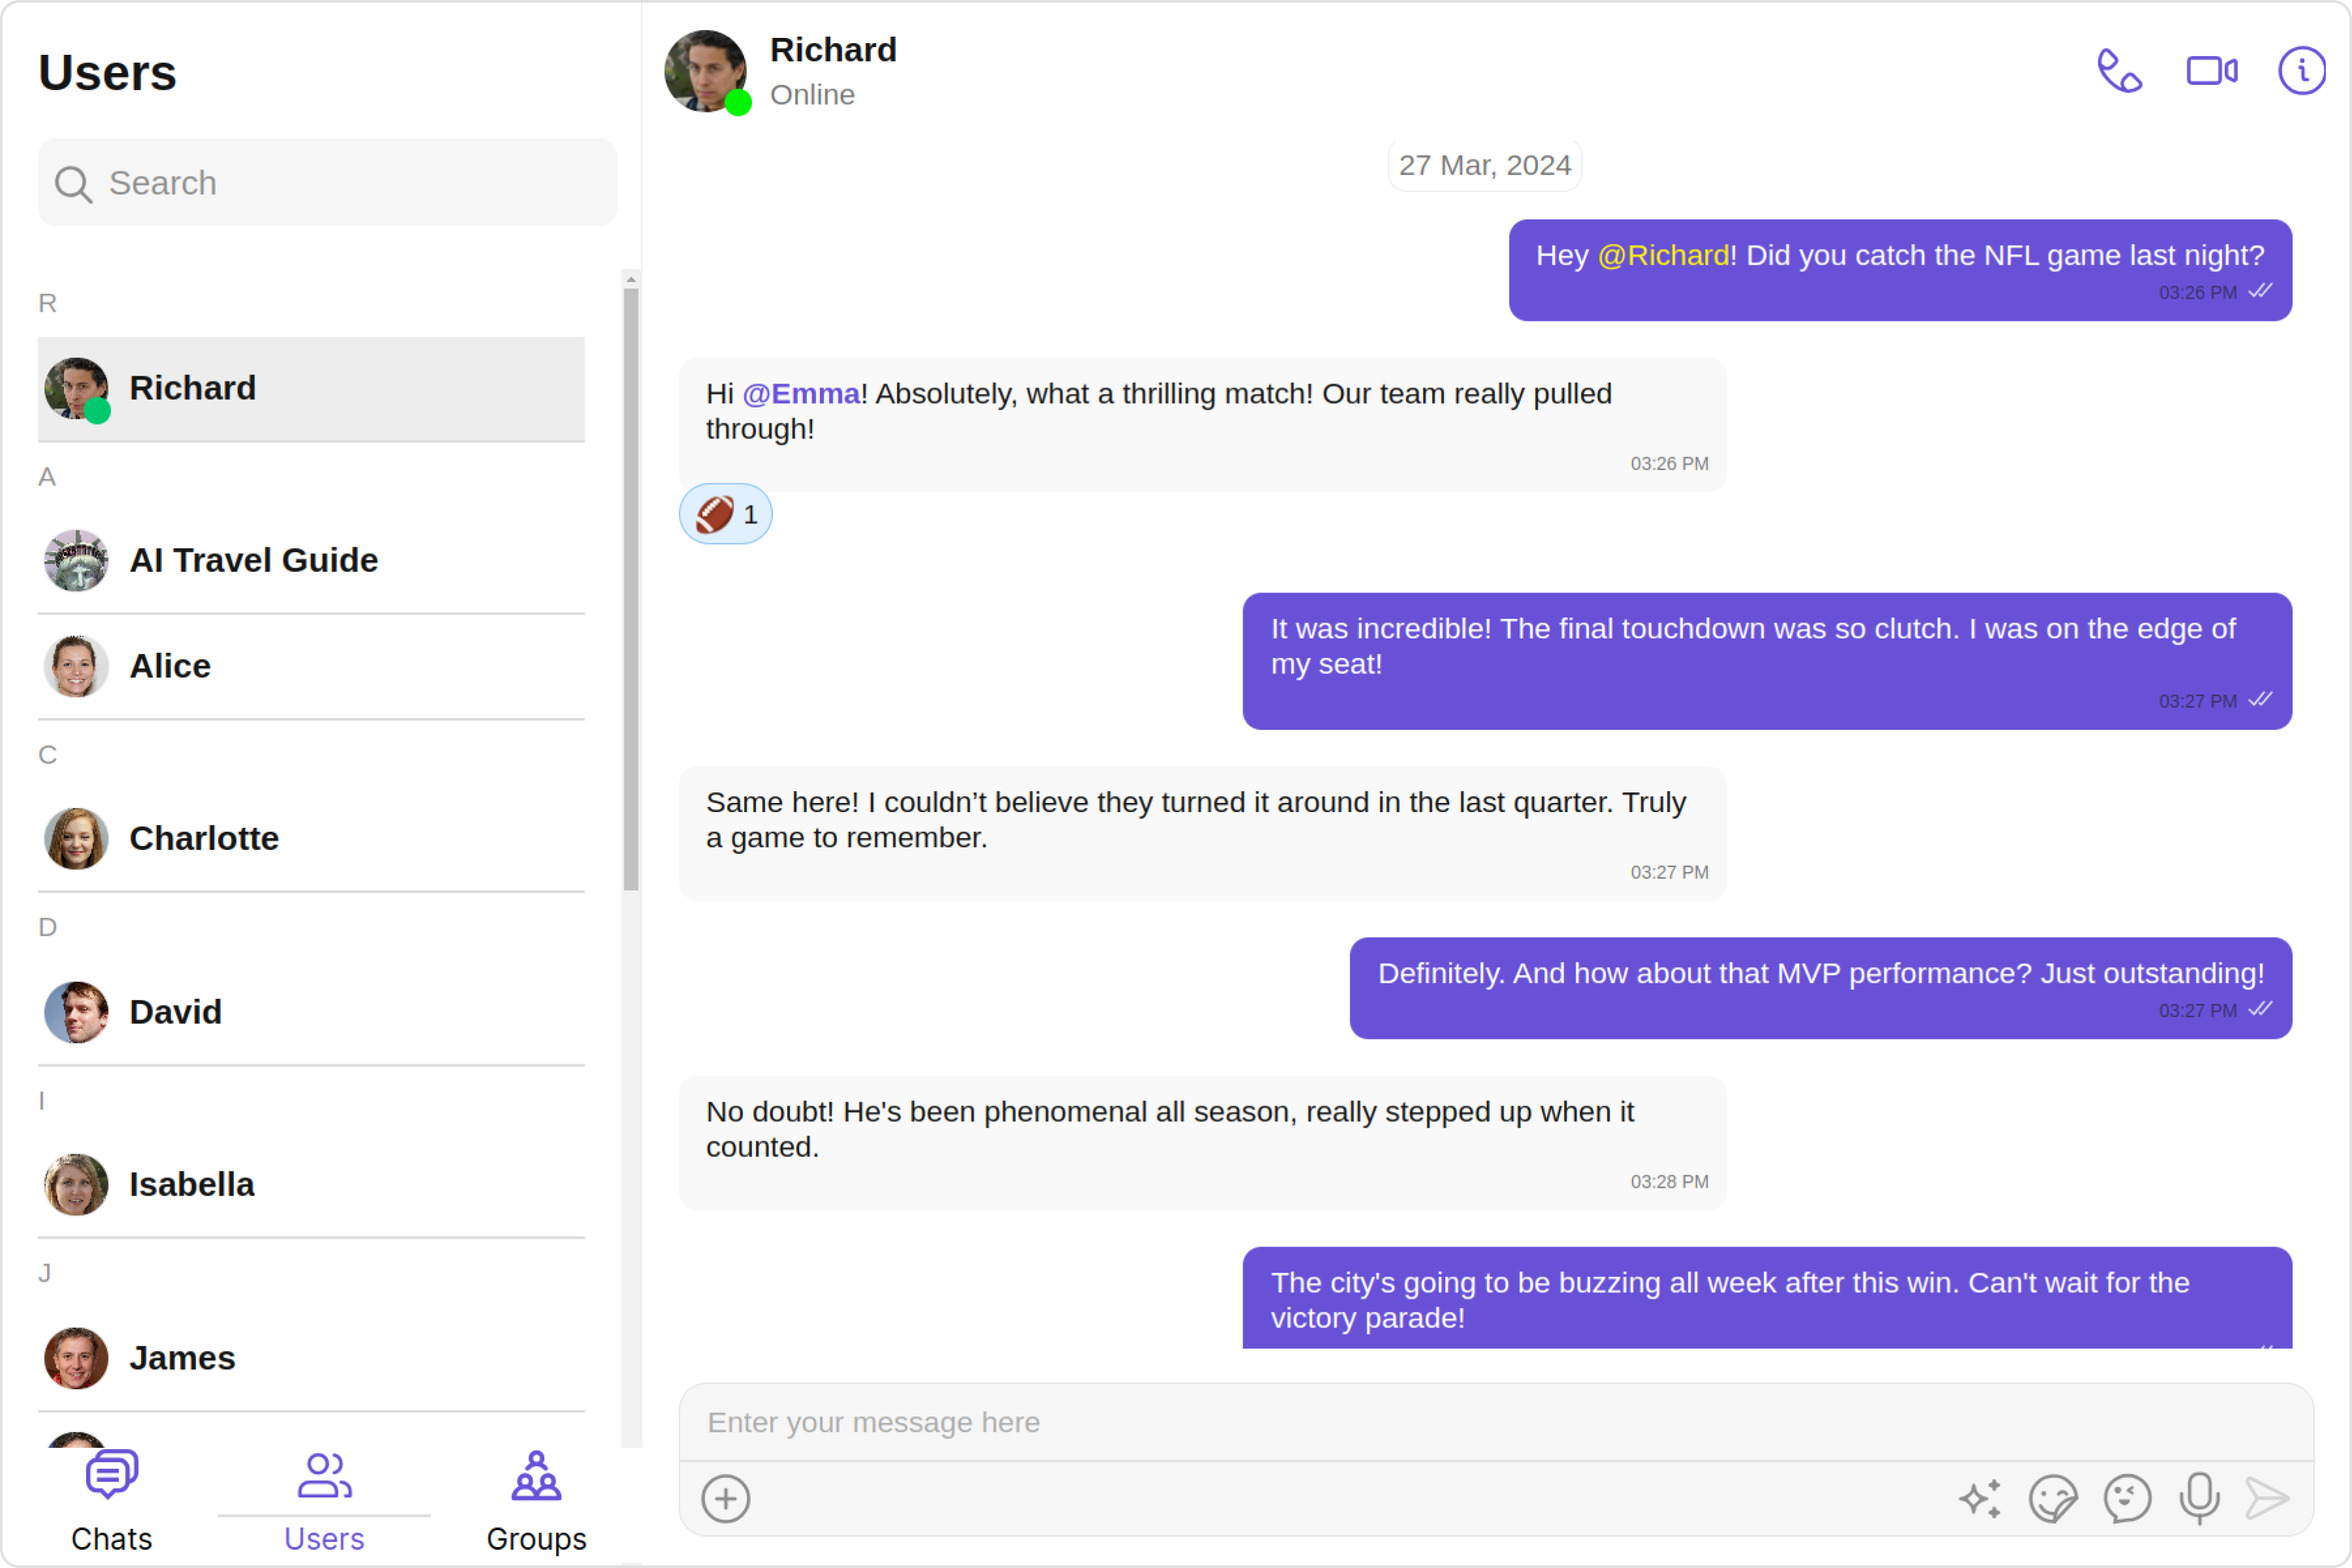
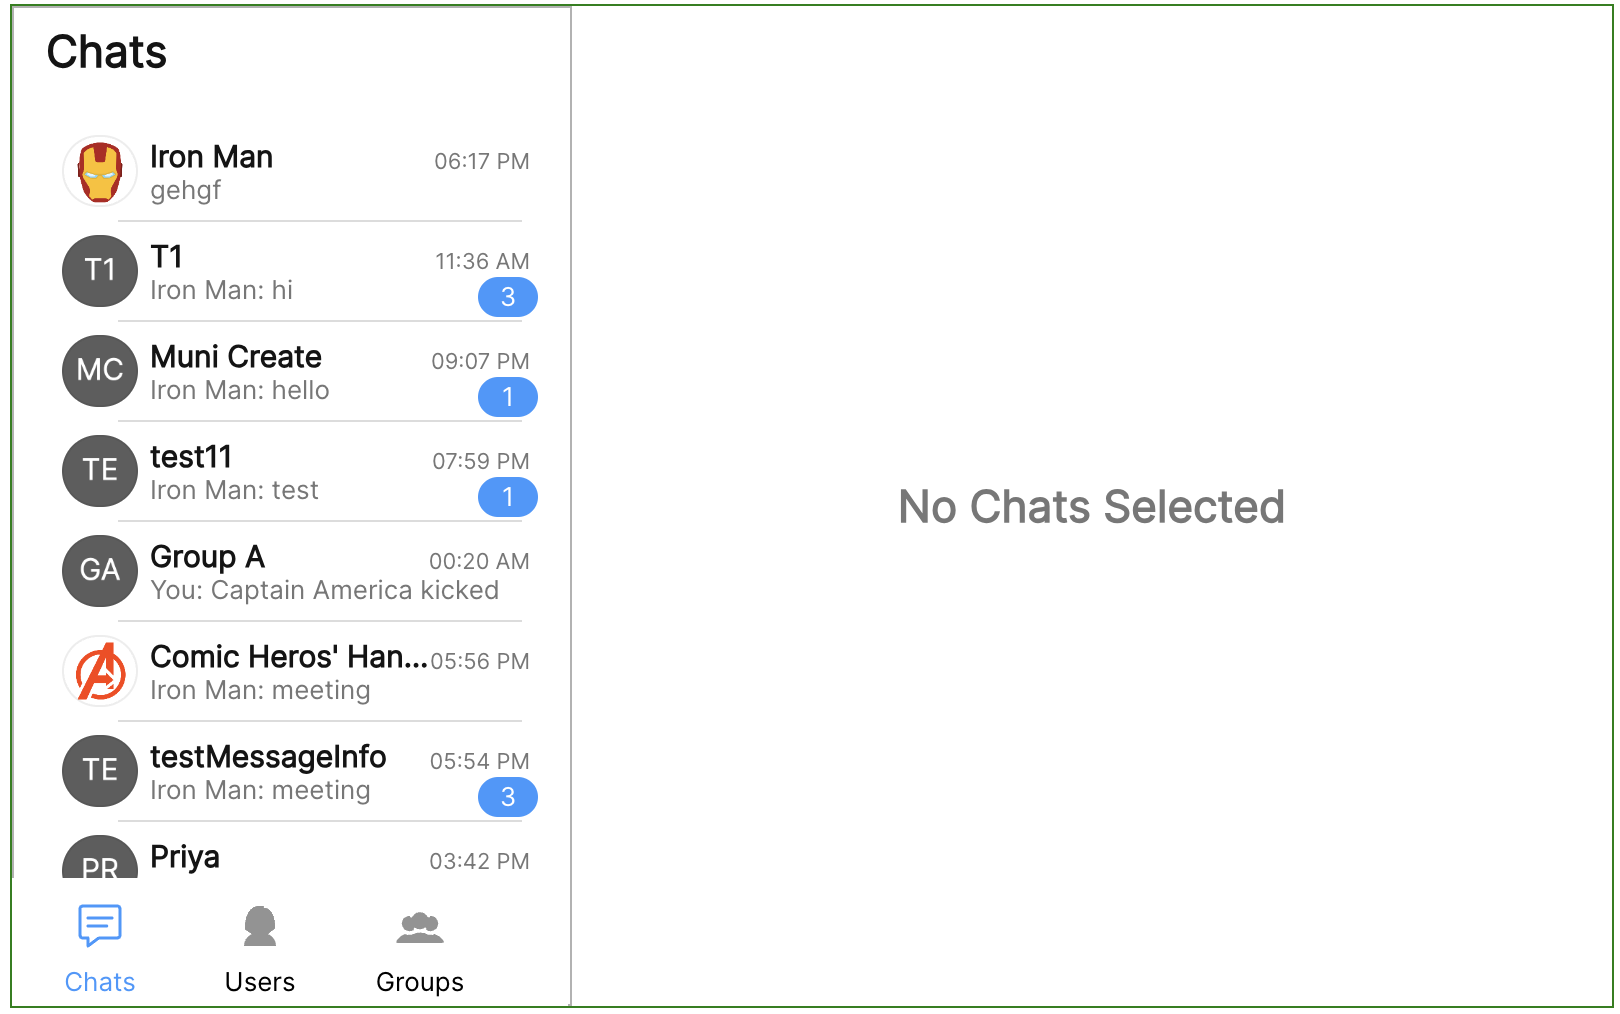
Multi-Tab Chat UI Guide
This guide will help you achieve a tabbed layout (aka Multi-Tab Chat UI) of the components available in CometChatUIKit for React.

We’ll use the CometChatConversationsWithMessages, CometChatUsersWithMessages, and CometChatGroupsWithMessages components and launch them as individual tab items within the tabbed layout.
Step 1: Create a new component CometChatUI
- CometChatUI.tsx
export function CometChatUI() {

	return (
	    <div style={{ width: "100%", height: "100%" }}><div>
	);
}
Step 2: Import the CometChatTabs component from the UI Kit.
- CometChatUI.tsx
import { CometChatTabs } from "@cometchat/chat-uikit-react";

export function CometChatUI() {
  return (
      <div style={{ width: "100%", height: "100%" }}>
        <CometChatTabs
          tabAlignment={TabAlignment.bottom}
          tabs={tabs}
          tabsStyle={tStyle}
        />
      </div>
  );
}
Step 3: Pass CometChatConversationsWithMessages, CometChatUsersWithMessages, CometChatGroupsWithMessages components to the Tabs components to launch them as individual tab item.
- CometChatUI.tsx
import { React, useEffect, useState } from "react";
import { TabAlignment, CometChatTabItem } from "@cometchat/uikit-resources";
import {
  CometChatUsersWithMessages,
  CometChatGroupsWithMessages,
  CometChatConversationsWithMessages,
  CometChatTabs,
} from "@cometchat/chat-uikit-react";

import usersTabIcon from "./assets/users.svg";
import groupsTabIcon from "./assets/groups.svg";
import chatsTabIcon from "./assets/chats.svg";

export function CometChatUI() {
  const chatsTab = new CometChatTabItem({
    id: "chats",
    iconURL: chatsTabIcon,
    title: "Chats",
    childView: <CometChatConversationsWithMessages />,
  });

  const usersTab = new CometChatTabItem({
    id: "users",
    iconURL: usersTabIcon,
    title: "Users",
    childView: <CometChatUsersWithMessages />,
  });

  const groupsTab = new CometChatTabItem({
    id: "groups",
    title: "Groups",
    iconURL: groupsTabIcon,
    childView: <CometChatGroupsWithMessages />,
  });

  const tabs = [chatsTab, usersTab, groupsTab];

  return (
      <div style={{ width: "100%", height: "100%" }}>
        <CometChatTabs
          tabAlignment={TabAlignment.bottom}
          tabs={tabs}
          tabsStyle={tStyle}
        />
      </div>
  );
}
Step 4: We make the Chats tab the active tab by default. Apply styles to all the tab items, as well as the entire tabs component, and align them to the bottom of the container. The tab items are draggable so that the user is able to drag and drop them within the container.
- CometChatUI.tsx
import { BaseStyle, TabItemStyle } from "@cometchat/uikit-shared";
import {
    CometChatConversationsWithMessages,
    CometChatGroupsWithMessages,
    CometChatTabs,
    CometChatUsersWithMessages,
    TabsStyle
} from "@cometchat/chat-uikit-react";
import { CometChatTabItem, TabAlignment } from "@cometchat/uikit-resources";
import { useEffect, useState } from "react";
import usersTabIcon from "./assets/users.svg";
import groupsTabIcon from "./assets/groups.svg";
import chatsTabIcon from "./assets/chats.svg";
export function CometChatUI() {
    const [isMobileView, setIsMobileView] = useState(false);
    const tabItemStyle = new TabItemStyle({
      iconTint: "#6851D6",
      width: "93px",
      height: "auto",
      activeTitleTextColor: "#6851D6",
      background:'#fff',
      activeIconTint:'#6851D6',
    });
    const tStyle = new TabsStyle({
        tabListHeight: "50px",
        tabListWidth: "280px",
        });
    const chatsTab = new CometChatTabItem({
      id: "chats",
      title: "Chats",
      iconURL: chatsTabIcon,
      style: tabItemStyle,
      isActive: true,
      childView: (
        <CometChatConversationsWithMessages isMobileView={isMobileView} />
      ),
    });
    const usersTab = new CometChatTabItem({
      id: "users",
      title: "Users",
      iconURL: usersTabIcon,
      style: tabItemStyle,
      childView: <CometChatUsersWithMessages />,
    });
    const groupsTab = new CometChatTabItem({
      id: "groups",
      title: "Groups",
      iconURL: groupsTabIcon,
      style: tabItemStyle,
      childView: <CometChatGroupsWithMessages isMobileView={isMobileView} />,
    });
    const tabs = [chatsTab, usersTab, groupsTab];
    const resizeWindow = () => {
      const innerWidth = window.innerWidth;
      if (innerWidth >= 320 && innerWidth <= 767) {
        setIsMobileView(true);
      } else {
        setIsMobileView(false);
      }
    };
    useEffect(() => {
      resizeWindow();
      window.addEventListener("resize", resizeWindow);
      return () => window.removeEventListener("resize", resizeWindow);
    }, []);
    return (
      <div style={{ width: "100%", height: "100%" }}>
        <CometChatTabs
          tabAlignment={TabAlignment.bottom}
          tabs={tabs}
          tabsStyle={tStyle}
        />
      </div>
    );
  }
Step 5: Import the CometChatUI component into your App component.
- App.jsx
- index.jsx
import logo from "./logo.svg";
import "./App.css";
import { CometChatUI } from "./CometChatUI";

function App(props) {
  return (
    <div className="App">
      <CometChatUI />
    </div>
  );
}

export default App;
import React from 'react';
import ReactDOM from 'react-dom/client';
import './index.css';
import App from './App';
import { UIKitSettingsBuilder } from '@cometchat/uikit-shared';
import { CometChatUIKit } from '@cometchat/chat-uikit-react';

const urlParams = new URLSearchParams(window.location.search);

const appID = "APP_ID";
const region = "REGION";
const authKey = "AUTH_KEY";
const uid = urlParams.get('uid') || "superhero1";

const uiKitSettings = new UIKitSettingsBuilder()
.setAppId(appID)
.setRegion(region)
.setAuthKey(authKey)
.subscribePresenceForFriends()
.build();

CometChatUIKit.init(uiKitSettings)?.then((response) => {
  console.log('CometChatUIKit initialization completed successfully');

  CometChatUIKit.login(uid)?.then(user => {
    console.log('CometChatUIKit login completed successfully');
    const root = ReactDOM.createRoot(document.getElementById('root') as HTMLElement);
    root.render(<App />);

  });

});
You can now see chats, users and group components each as tab items. This is how you can launch CometChat UIKit’s individual component in a tabbed layout. 🎉
