Capacitor, Cordova & Ionic
Learn how to setup Push Notifications for Capacitor, Cordova and Ionic framework using Firebase Cloud Messaging or FCM.
Firebase Project Setup
Visit Firebase Console and login/signup using your Gmail ID.
Step 1: Create a new Firebase Project
On your Firebase Console, create a new project.

This is a simple 3 step process where:
- You give a name to your project
- Add Google Analytics to your project (Optional)
- Configure Google Analytics account (Optional)
Click on Create and you are ready to go.
Step 2: Add Firebase to your App
React native setup will require 2 files for Android and iOS:
- For Android, you need to download the
google-services.jsonfile. You can refer to the Android Firebase Project Setup - Step 2 and resume here once done. - For iOS, you need to download the
GoogleService-Info.plistfile. You can refer to the iOS Firebase Project Setup - Step 2 and resume here once done. - For web, you need to have the Firebase Config object. You can refer to the Web Firebase Project Setup - Step 2 and resume here once done.
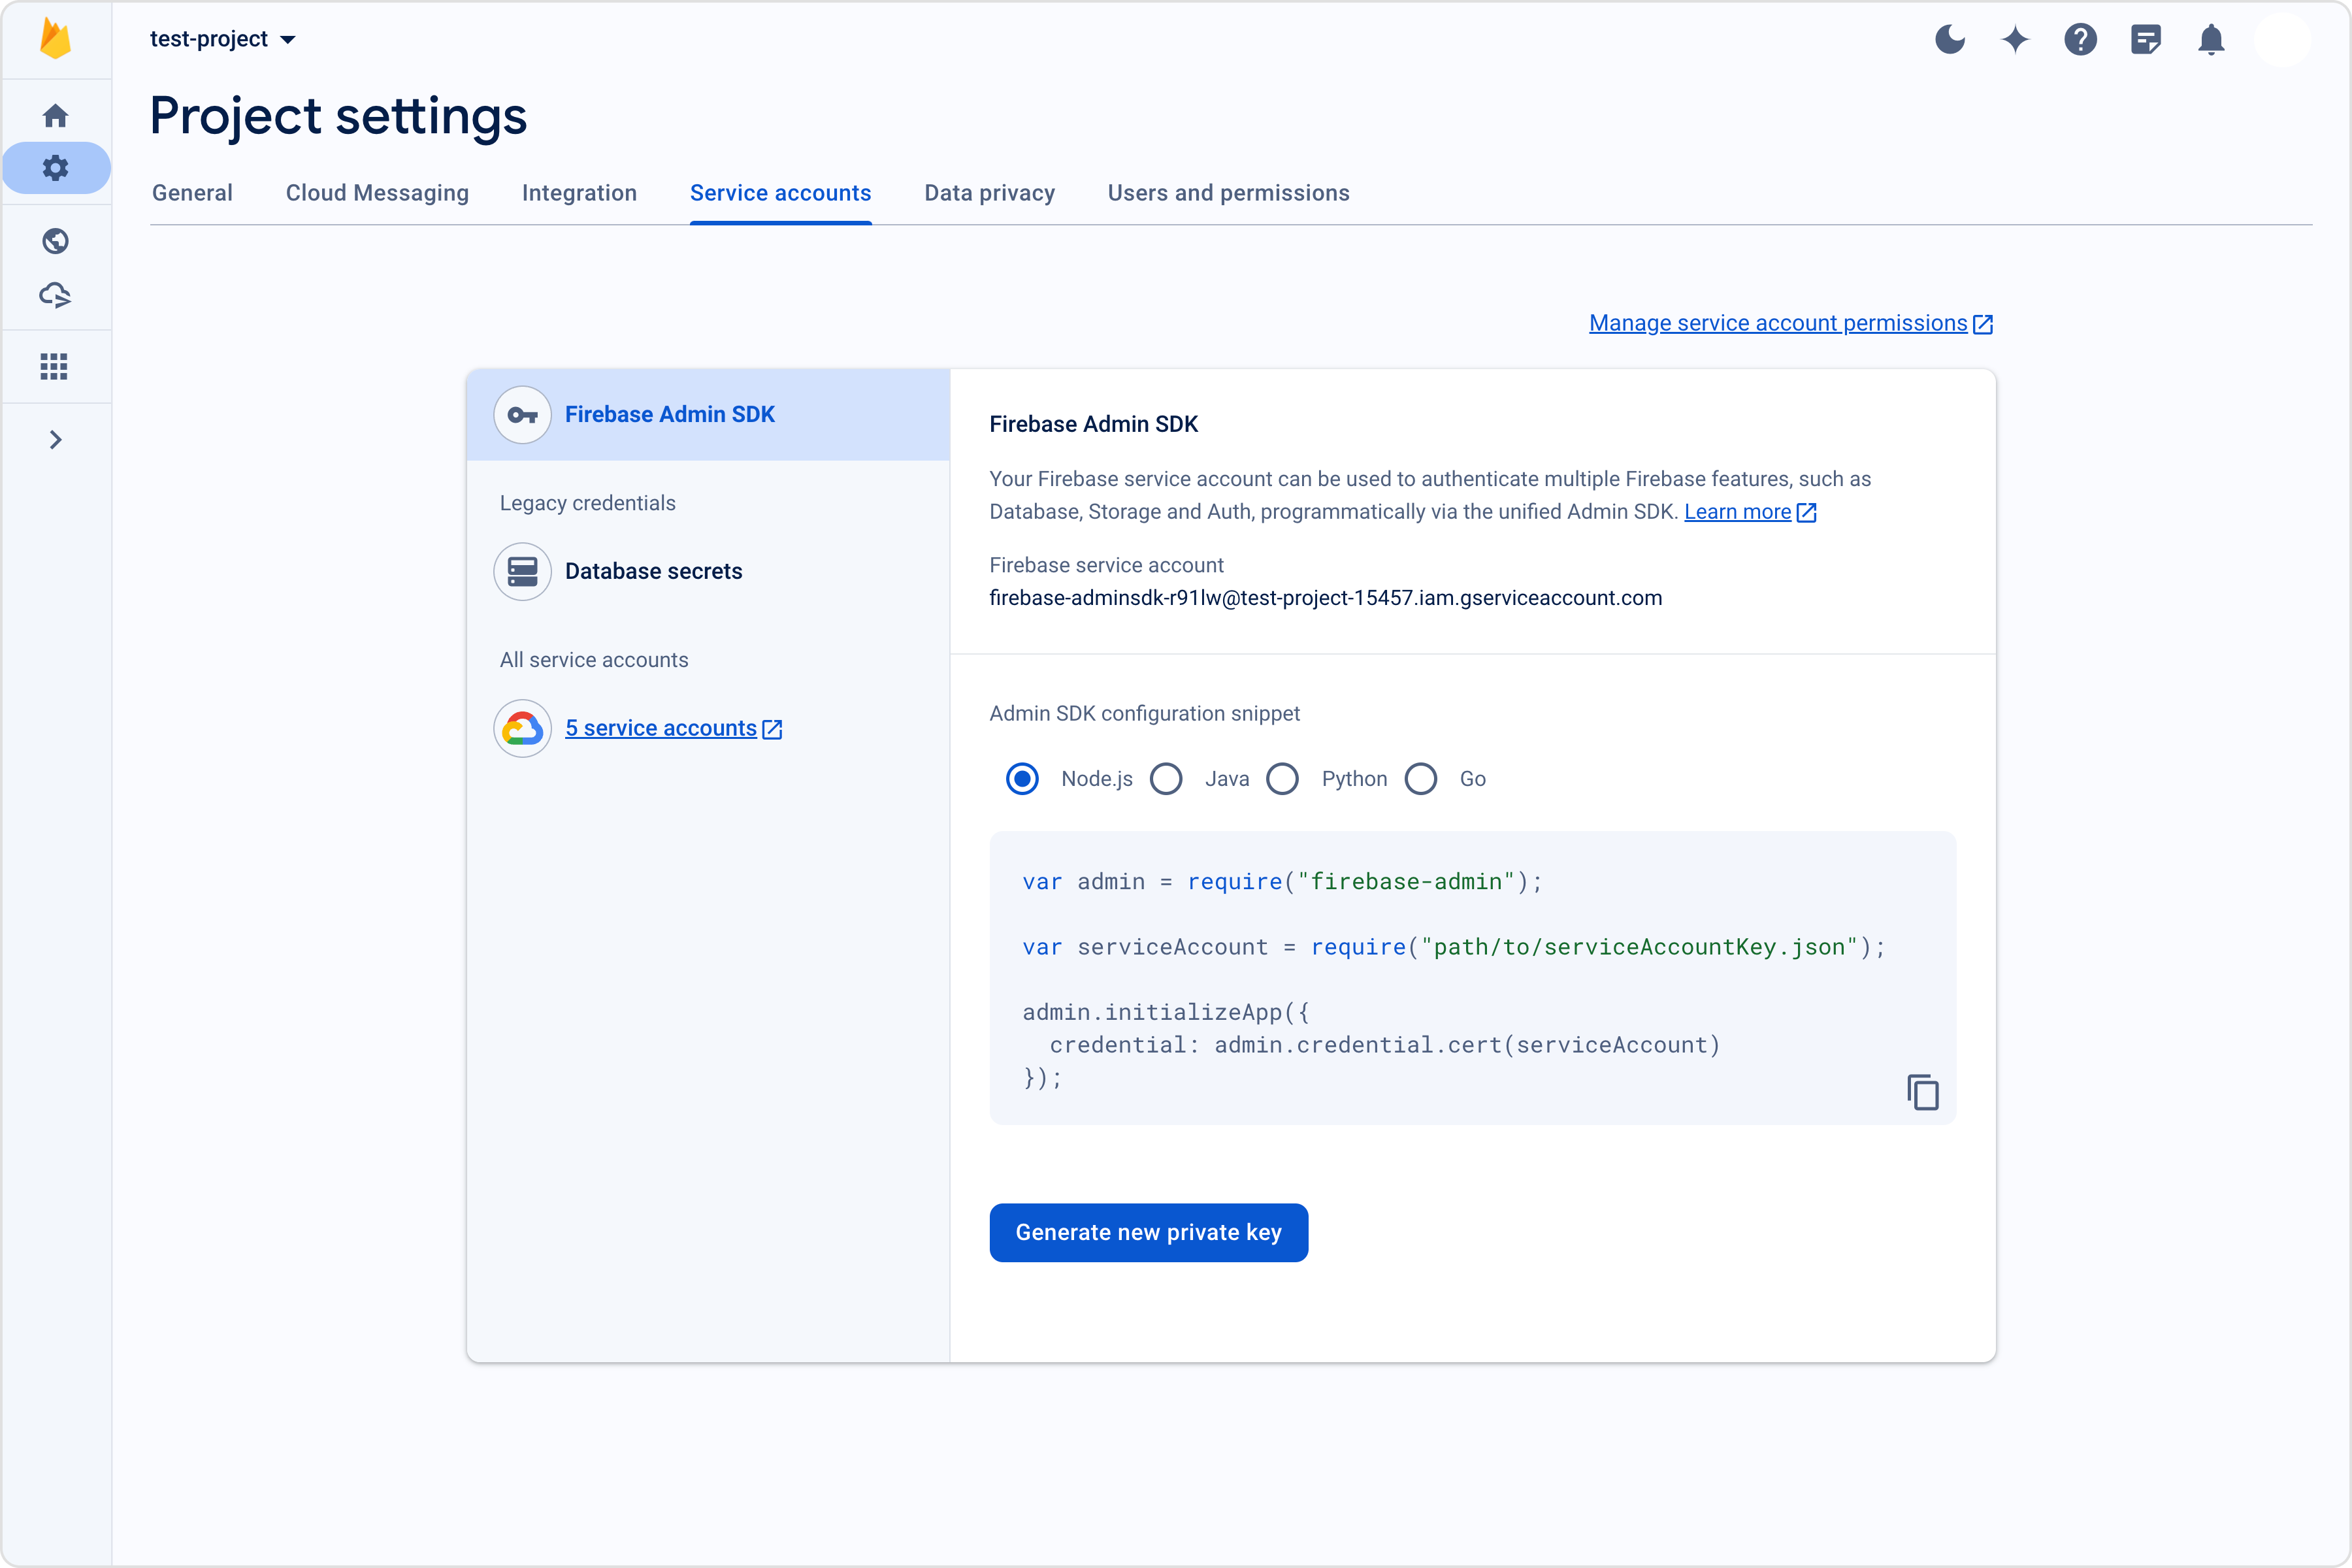
Step 3: Download the service account file
Extension settings
Step 1: Enable the extension
- Login to CometChat and select your app.
- Go to the Extensions section and Enable the Push Notifications extension.
- Open the settings for this extension and save the following.
Step 2: Save your settings
On the Settings page you need to enter the following:
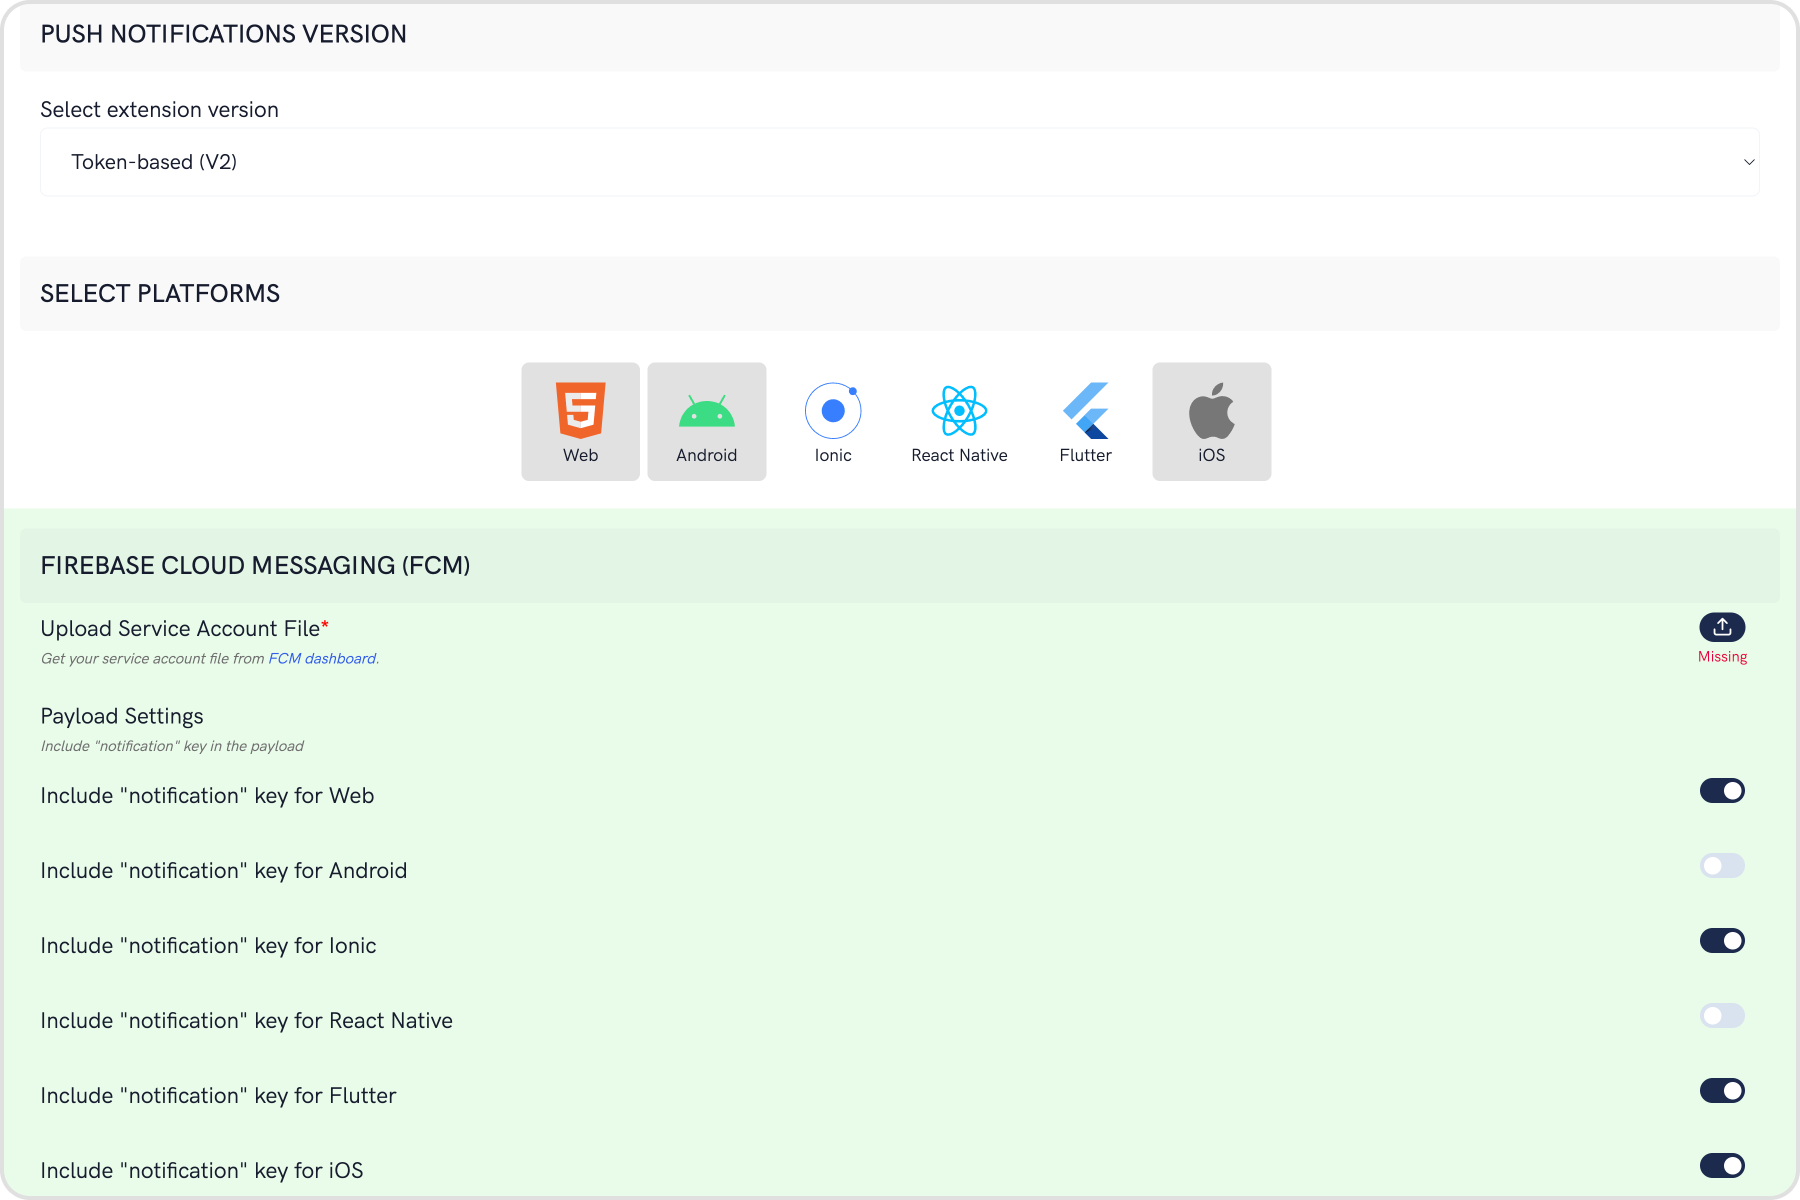
- Set extension version
- If you are setting it for the first time, Select
V2to start using the enhanced version of the Push Notification extension. The enhanced version uses Token-based approach for sending Push Notifications and is simple to implement. - If you already have an app using
V1and want to migrate your app to useV2, then SelectV1 & V2option. This ensures that the users viewing the older version of your app also receive Push Notifications. - Eventually, when all your users are on the latest version of your app, you can change this option to
V2, thus turning offV1(Topic-based) Push Notifications completely.
- Select the platforms that you want to support
- Select from Web, Android, Ionic, React Native, Flutter & iOS.
- Notification payload settings
- You can control if the notification key should be in the Payload or not. Learn more about the FCM Messages here.
- Notification Triggers
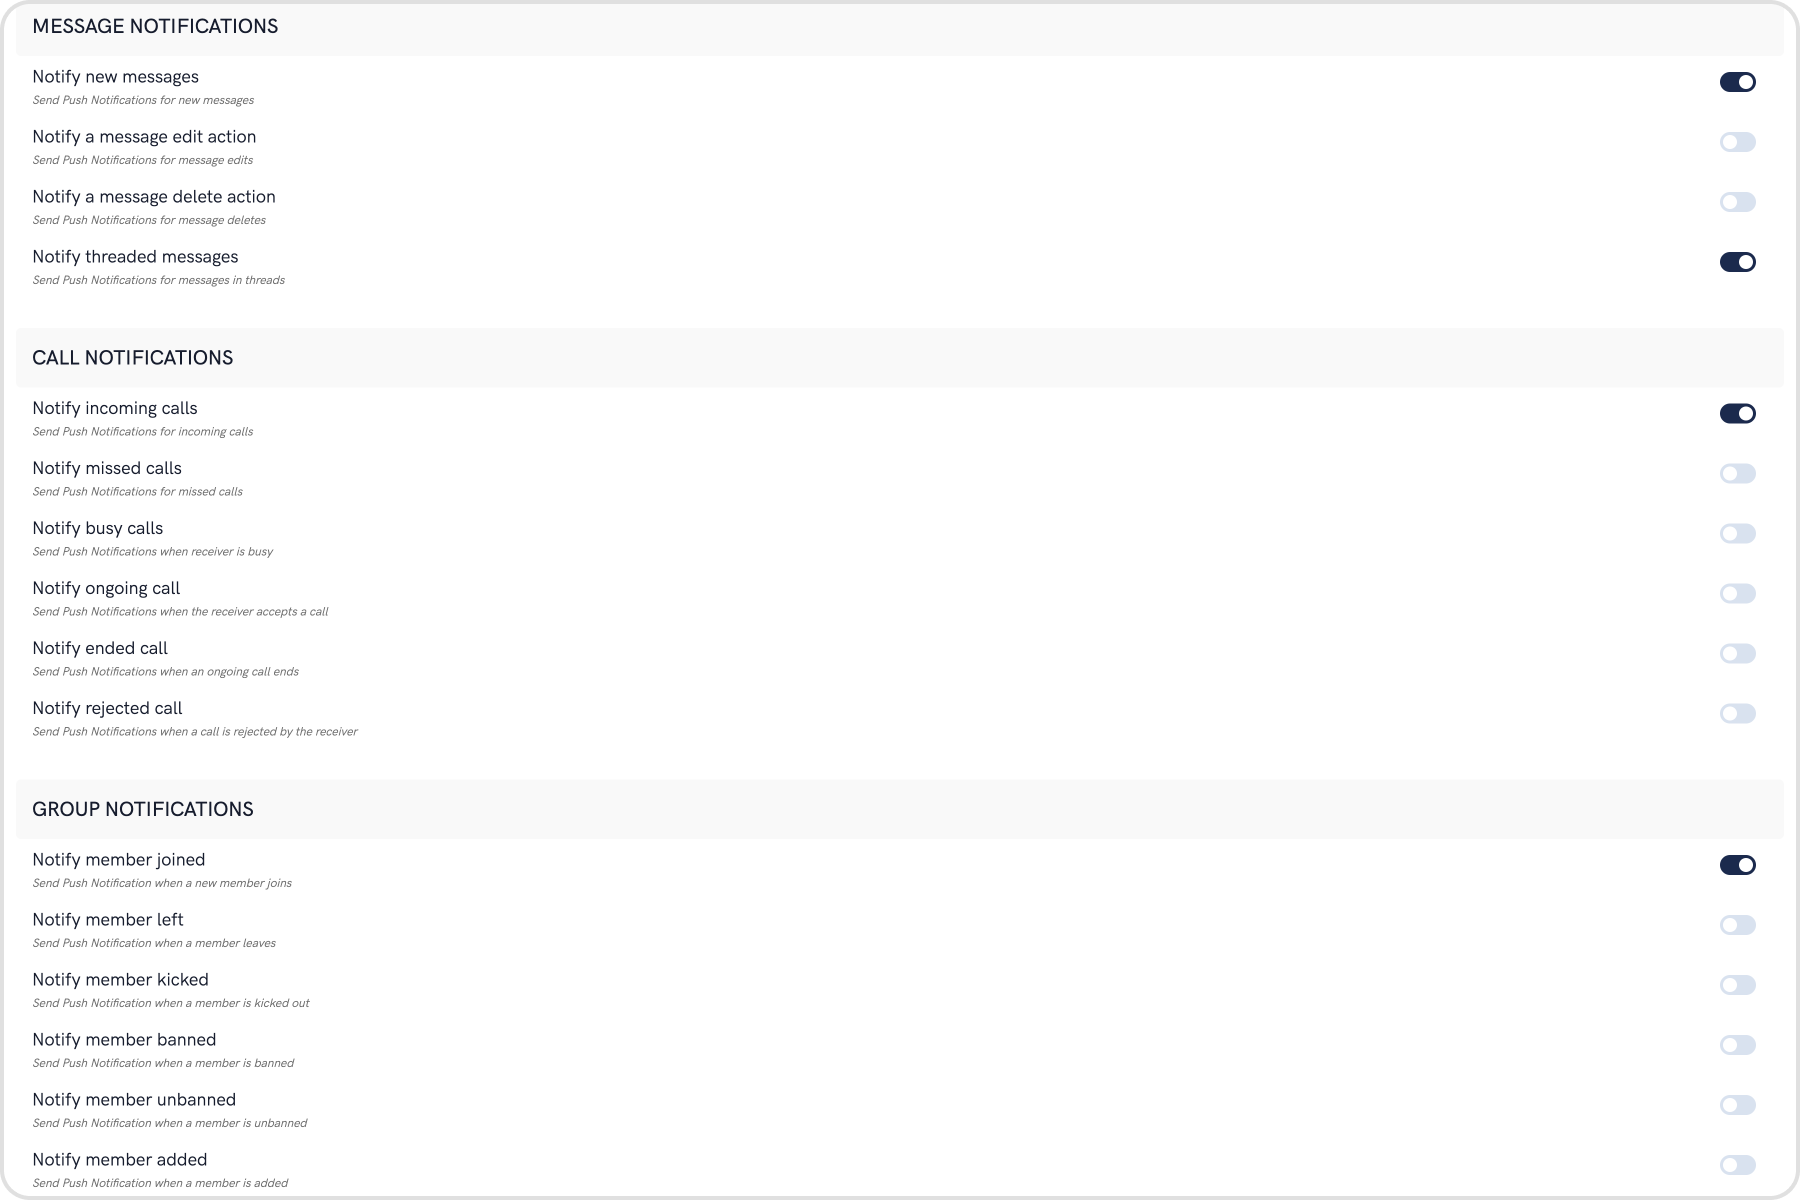
- Select the triggers for sending Push Notifications. These triggers can be classified into 3 main categories:
- Message Notifications
- Call Notifications
- Group Notifications
- These are pretty self-explanatory and you can toggle them as per your requirement.
App Setup
Step 1: Initial plugin setup
- For Cordova & Ionic, there are numerous plugins available via NPM which can be used to set up push notifications for your apps like FCM Plugin and Push Plugin.
- To setup Push Notification, you need to follow the steps mentioned in the Plugin's Documentation.
At this point, you will have:
- Separate apps created on the Firebase console. (For Web, Android and iOS).
- Plugin setup completed as per the respective documentation.
Step 2: Register FCM Token
- This step assumes that you already have a React Native app setup with CometChat installed. Make sure that the CometChat object is initialized and user has been logged in.
- On the success callback of user login, you can fetch the FCM Token and register it with the extension as shown below:
- Javascript
// Pseudo-code with async-await syntax
// Using the FCM Plugin

const APP_ID = 'APP_ID';
const REGION = 'REGION';
const AUTH_KEY = 'AUTH_KEY';

const UID = 'UID';
const APP_SETTINGS = new CometChat.AppSettingsBuilder().subscribePresenceForAllUsers().setRegion(REGION).build();

try {
  // First initialize the app
  await CometChat.init(APP_ID, APP_SETTINGS);

  // Login the user
  await CometChat.login(UID, AUTH_KEY);

  // Login is successful so next step
  // Get the FCM device token
  // You should have imported the following in the file:
  // import { FCM } from '@ionic-native_fcm';
  const FCM_TOKEN = await fcm.getToken();

  // Register the token with Enhanced Push Notifications extension
  await CometChat.registerTokenForPushNotification(FCM_TOKEN);
} catch (error) {
  // Handle errors gracefully
}
- Registration also needs to happen in case of token refresh as shown below:
- Javascript
// Pseudo-code

// You should have imported the following in the file:
// import { FCM } from '@ionic-native_fcm';
try {
  // Listen to whether the token changes
	return fcm.onTokenRefresh(FCM_TOKEN => {
  	await CometChat.registerTokenForPushNotification(FCM_TOKEN);
  });
  // ...
} catch(error) {
  // Handle errors gracefully
}
For more details, visit documentation.
Step 3: Receive Notifications
- Javascript
// Pseudo-code
import messaging from '@react-native-firebase_messaging';
import { Alert } from 'react-native';

// Implementation can be done in a life-cycle method or hook
const unsubscribe = messaging().onMessage(async (remoteMessage) => {
  Alert.alert('A new FCM message arrived!', JSON.stringify(remoteMessage));
});
Step 4: Stop receiving Notifications
- On CometChat.logout will stop receiving notifications.
- As a good practice, you can also delete the FCM Token by calling
deleteTokenon the fcm object.
- Javascript
// Pseudo-code using async-await syntax

logout = async () => {
  // User logs out of the app
  await CometChat.logout();
};
Advanced
Handle Custom Messages
To receive notification of CustomMessage, you need to set metadata while sending the CustomMessage.
- Javascript
var receiverID = 'UID';
var customData = {
  latitude: '50.6192171633316',
  longitude: '-72.68182268750002',
};

var customType = 'location';
var receiverType = CometChat.RECEIVER_TYPE.USER;
var metadata = {
  pushNotification: 'Your Notification Message',
};

var customMessage = new CometChat.CustomMessage(receiverID, receiverType, customType, customData);

customMessage.setMetadata(metadata);

CometChat.sendCustomMessage(customMessage).then(
  (message) => {
    // Message sent successfully.
    console.log('custom message sent successfully', message);
  },
  (error) => {
    console.log('custom message sending failed with error', error);
    // Handle exception.
  }
);
Converting push notification payload to message object
CometChat SDK provides a method CometChat.CometChatHelper.processMessage() to convert the message JSON to the corresponding object of TextMessage, MediaMessage,CustomMessage, Action or Call.
- Javascript
var processedMessage = CometChat.CometChatHelper.processMessage(JSON_MESSAGE);
Type of Attachment can be of the following the type:
CometChatConstants.MESSAGE_TYPE_IMAGE
CometChatConstants.MESSAGE_TYPE_VIDEO
CometChatConstants.MESSAGE_TYPE_AUDIO
CometChatConstants.MESSAGE_TYPE_FILE
Push Notification: Payload Sample for Text Message and Attachment/Media Message
- Text message
- Media message
{
  "alert": "Spiderman: Text Message",
  "sound": "default",
  "title": "CometChat",
  "message": {
    "receiver": "superhero4",
    "data": {
      "entities": {
        "receiver": {
          "entityType": "user",
          "entity": {
            "uid": "superhero4",
            "role": "default",
            "name": "Wolverine",
            "avatar": "http://data.cometchat.com/assets/images/avatars/wolverine.png",
            "status": "offline"
          }
        },
        "sender": {
          "entityType": "user",
          "entity": {
            "uid": "superhero3",
            "role": "default",
            "name": "Spiderman",
            "avatar": "https://data.cometchat.com/assets/images/avatars/spiderman.png",
            "status": "offline"
          }
        }
      },
      "text": "Text Message"
    },
    "sender": "superhero3",
    "receiverType": "user",
    "id": "142",
    "sentAt": 1555668711,
    "category": "message",
    "type": "text"
  }
}
{
  "alert": "Spiderman: has sent an image",
  "sound": "default",
  "title": "CometChat",
  "message": {
    "receiver": "superhero4",
    "data": {
      "attachments": [
        {
          "extension": "png",
          "size": 14327,
          "name": "extension_leftpanel.png",
          "mimeType": "image/png",
          "url": "https://s3-eu-west-1.amazonaws.com/data.cometchat.com/1255466c41bd7f/media/1555671238_956450103_extension_leftpanel.png"
        }
      ],
      "entities": {
        "receiver": {
          "entityType": "user",
          "entity": {
            "uid": "superhero4",
            "role": "default",
            "name": "Wolverine",
            "avatar": "https://data.cometchat.com/assets/images/avatars/wolverine.png",
            "status": "offline"
          }
        },
        "sender": {
          "entityType": "user",
          "entity": {
            "uid": "superhero3",
            "role": "default",
            "name": "Spiderman",
            "avatar": "https://data.cometchat.com/assets/images/avatars/spiderman.png",
            "status": "offline"
          }
        }
      },
      "url": "https://s3-eu-west-1.amazonaws.com/data.cometchat.com/1255466c41bd7f/media/1555671238_956450103_extension_leftpanel.png"
    },
    "sender": "superhero3",
    "receiverType": "user",
    "id": "145",
    "sentAt": 1555671238,
    "category": "message",
    "type": "image"
  }
}