Android - Connection Service
Learn how to send Push Notifications to your Android app using Firebase Cloud Messaging or FCM.
Firebase Project Setup
Visit Firebase Console and login/signup using your Gmail ID.
Step 1: Create a new Firebase Project
On your Firebase Console, create a new project.
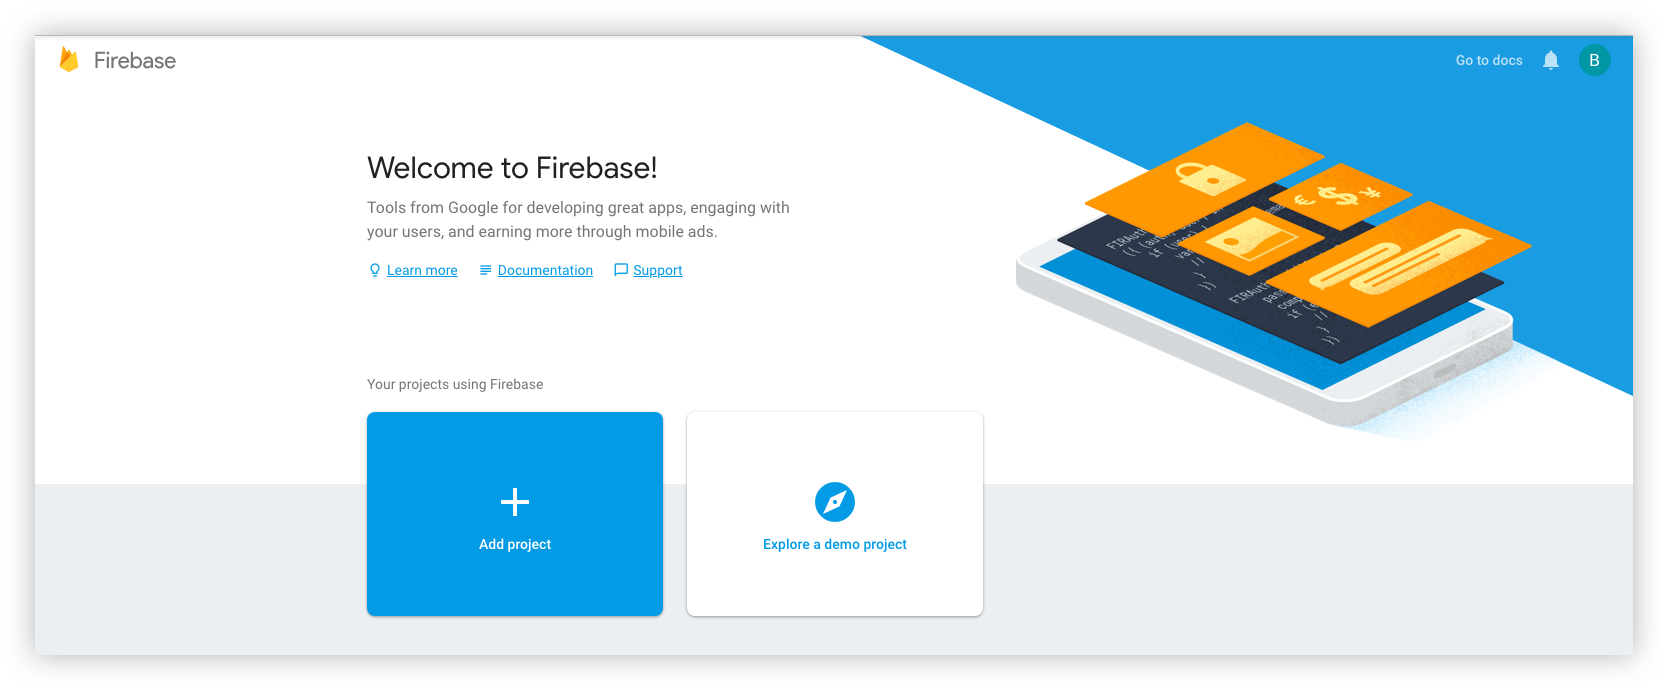
This is a simple 3 step process where:
- You give a name to your project
- Add Google Analytics to your project (Optional)
- Configure Google Analytics account (Optional)
Click on Create and you are ready to go.
Step 2: Add Firebase to your Android App
- Click on the Android icon as shown on the screen below.
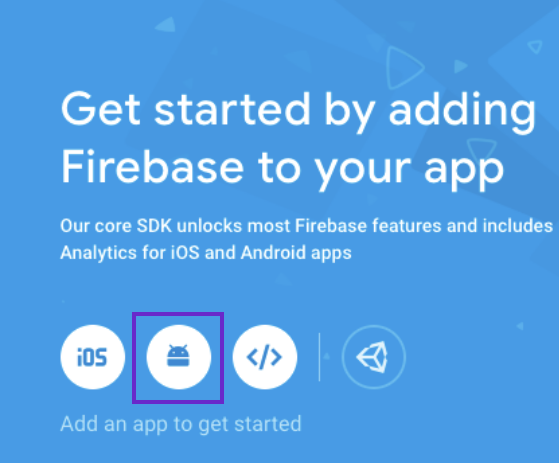
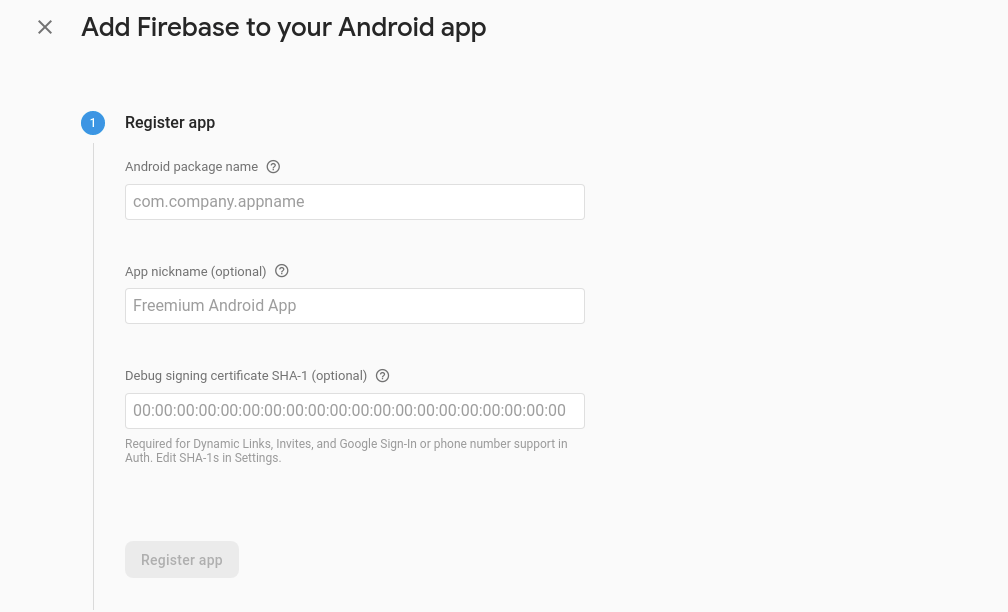
- Register your Android app by providing the following details:
- Android Package name
- App nickname (optional)
- Debug signing certificate SHA-1 (optional)
- Download the google-services.json file and place it in the required location in your project.

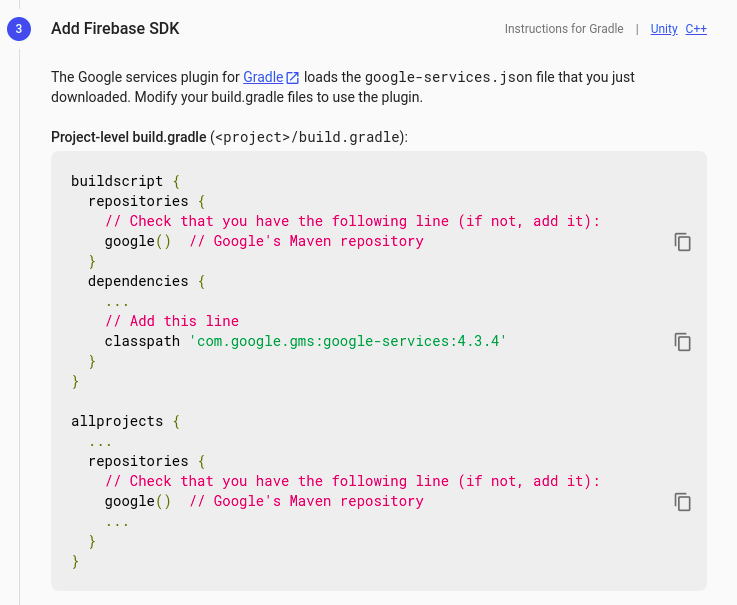
- Add Firebase SDK by copying and pasting the snippets in the Project-level build.gradle file.
- Add Firebase SDK by copying and pasting the snippets in the App-level build.gradle file.
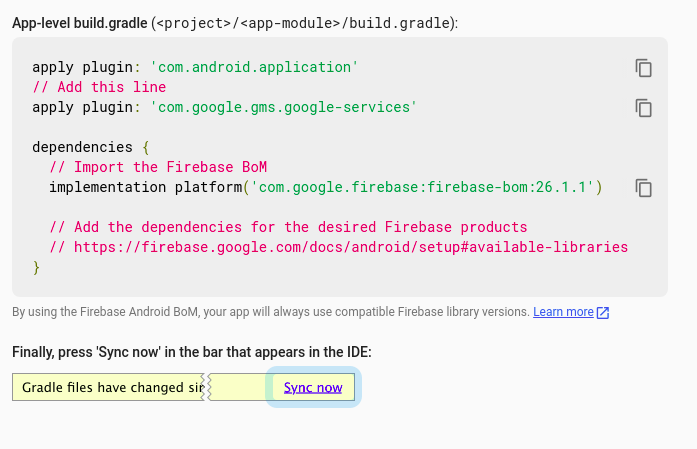
- Click on 'Continue to Console' to finish the setup.
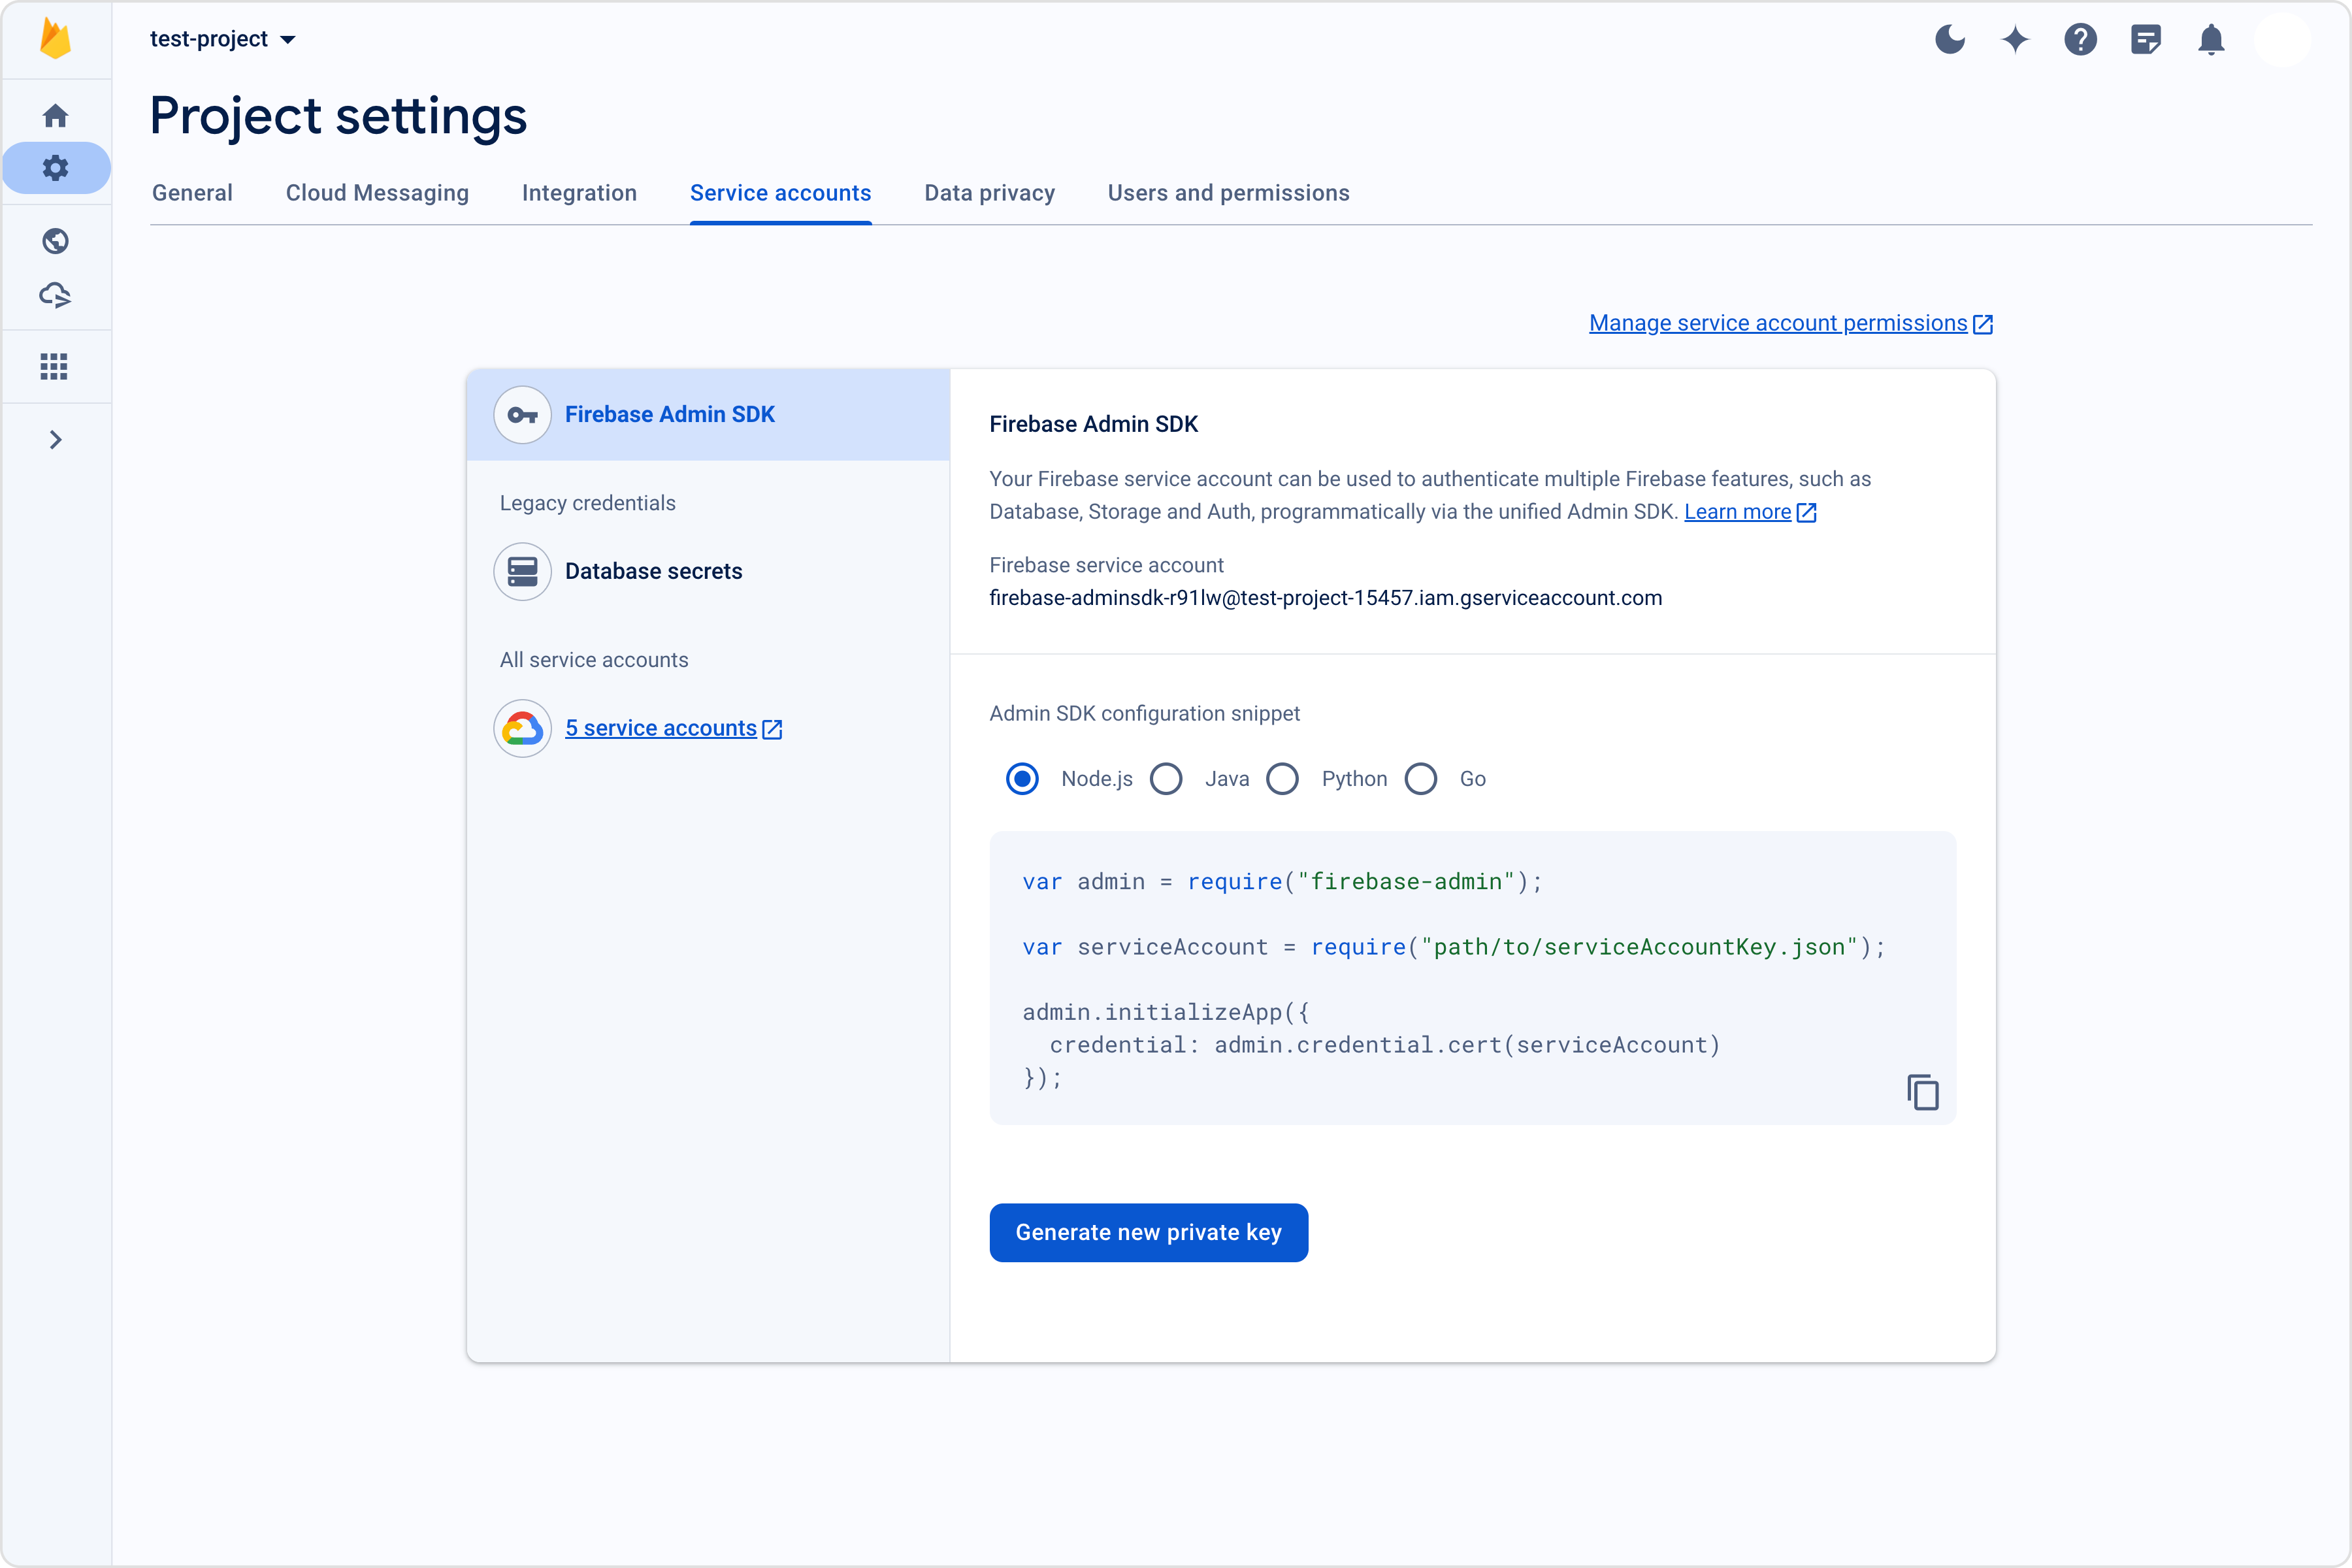
Step 3: Download the service account file
Extension settings
Step 1: Enable the extension
- Login to CometChat and select your app.
- Go to the Extensions section and Enable the Push Notifications extension.
- Open the settings for this extension and save the following.
Step 2: Save your settings
On the Settings page you need to enter the following:
- Set extension version
- If you are setting it for the first time, Select
V2to start using the enhanced version of the Push Notification extension. The enhanced version uses Token-based approach for sending Push Notifications and is simple to implement. - If you already have an app using
V1and want to migrate your app to useV2, then SelectV1 & V2option. This ensures that the users viewing the older version of your app also receive Push Notifications. - Eventually, when all your users are on the latest version of your app, you can change this option to
V2, thus turning offV1(Topic-based) Push Notifications completely.
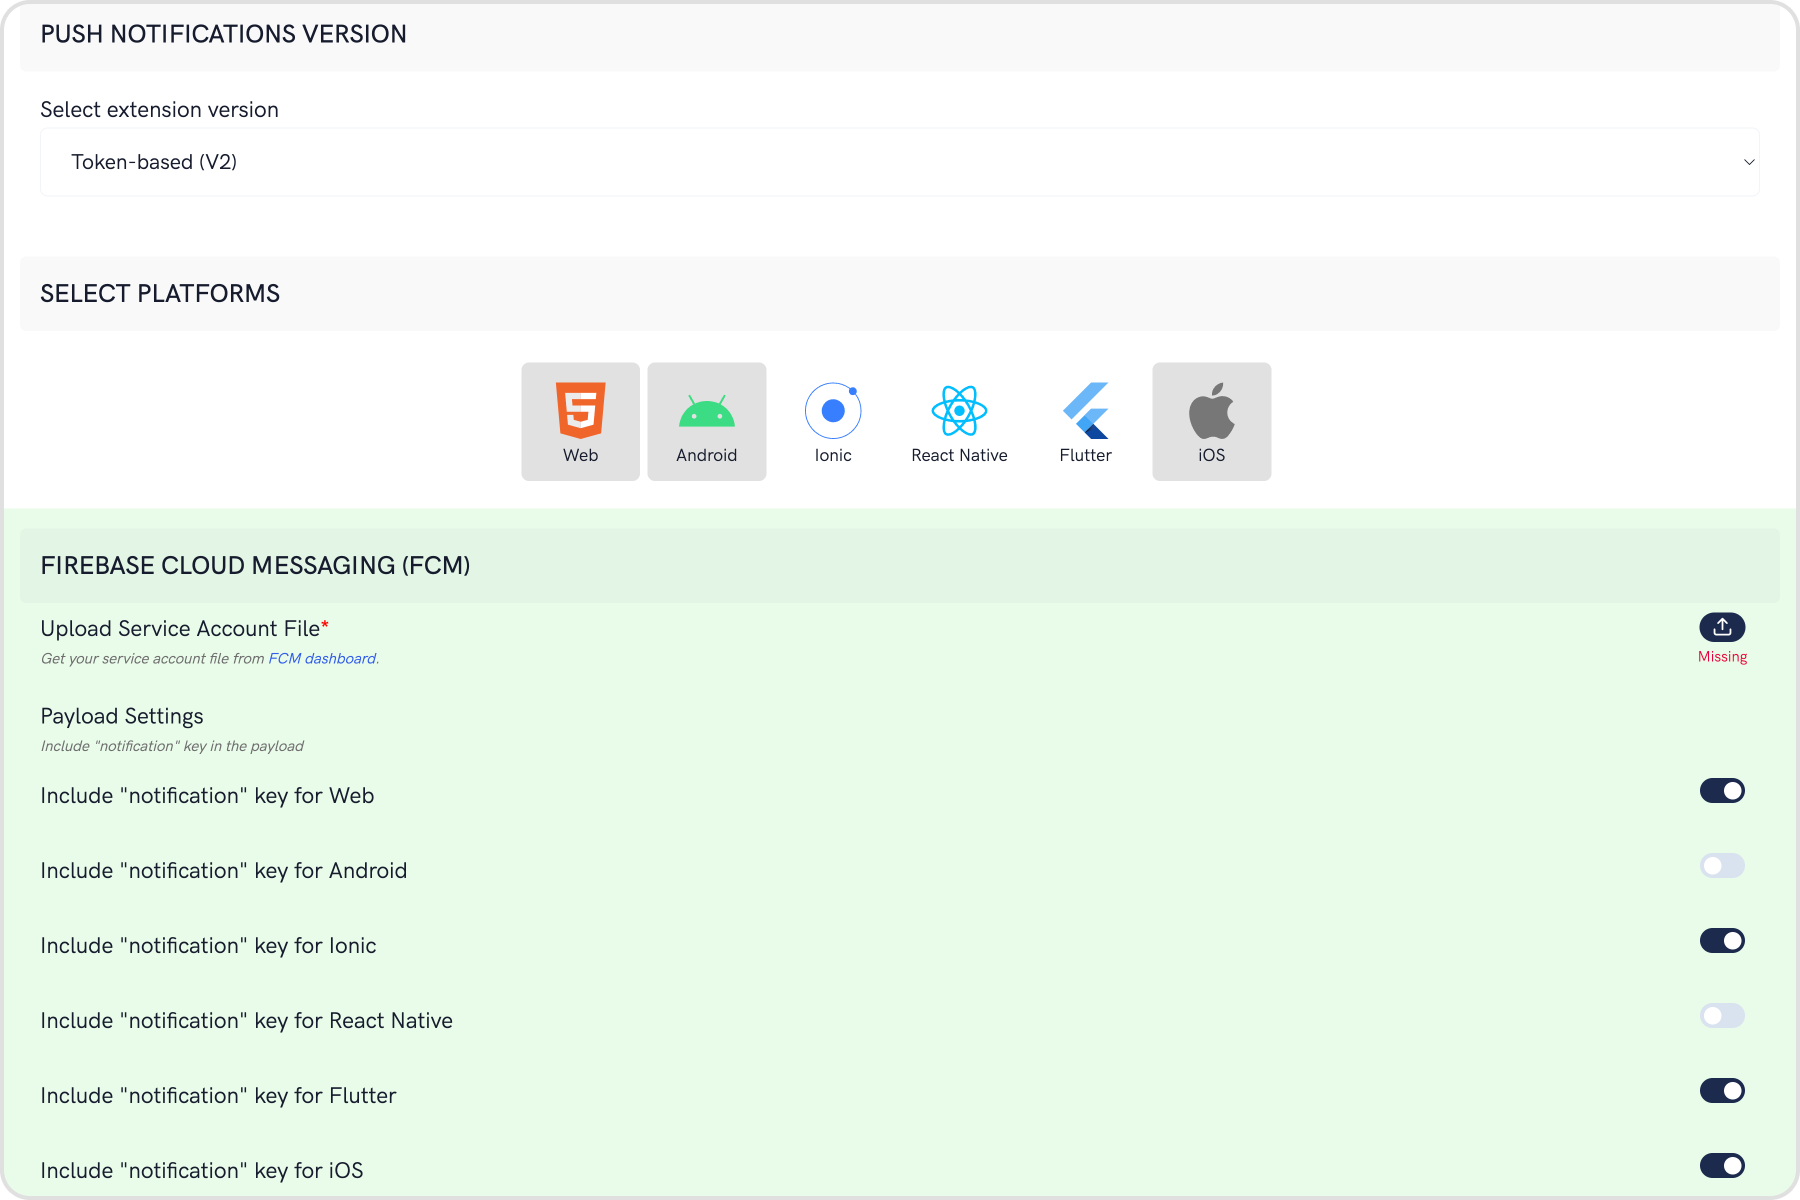
- Select the platforms that you want to support
- Select from Web, Android, Ionic, React Native, Flutter & iOS.
- Notification payload settings
- You can control if the notification key should be in the Payload or not. Learn more about the FCM Messages here.
- Notification Triggers
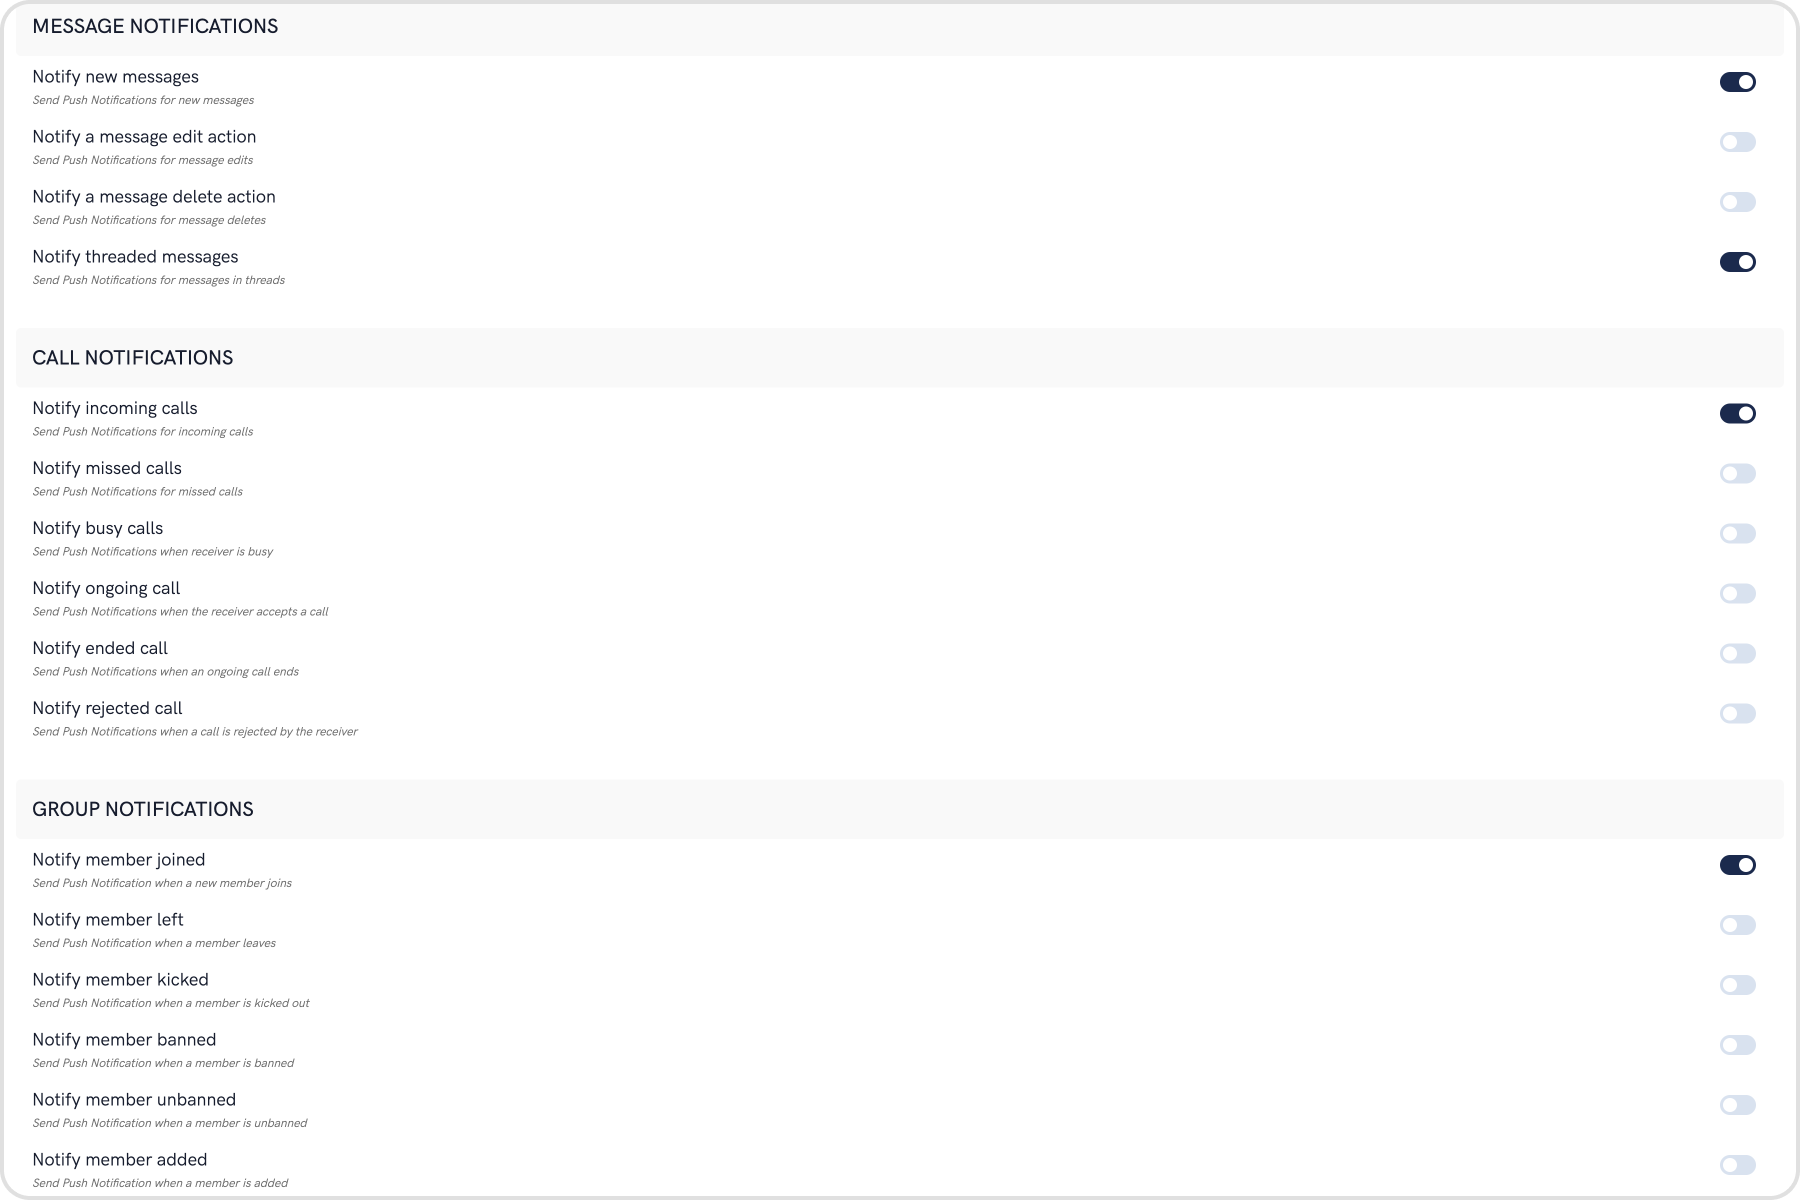
- Select the triggers for sending Push Notifications. These triggers can be classified into 3 main categories:
- Message Notifications
- Call Notifications
- Group Notifications
- These are pretty self-explanatory and you can toggle them as per your requirement.
Android App Setup
In the Firebase Project setup, we did the following things:
- Added google-services.json file to the project.
- Added the required Firebase SDK snippets to the Project-level build.grade file.
- Added the required Firebase SDK snippets to the App-level build.gradle file.
If you want more details, check the Firebase Documentation.
Step 1: Register the FCM Token on user login
- Initialize CometChat and then login your user.
- On successful login, you can register the obtained FCM Token using
CometChat.registerTokenForPushNotification()function call. (You can see the process of getting the FCM Token in the next step)
- Java
- Kotlin
CometChat.registerTokenForPushNotification(MyFirebaseMessagingService.token, new CometChat.CallbackListener<String>() {
    @Override
    public void onSuccess(String s) {
        Log.e( "onSuccessPN: ",s );
    }
    @Override
    public void onError(CometChatException e) {
        Log.e("onErrorPN: ",e.getMessage() );
    }
});
CometChat.registerTokenForPushNotification(MyFirebaseMessagingService.token, object : CallbackListener<String?>() {
            override fun onSuccess(s: String?) {
                Log.e("onSuccessPN: ", s)
            }

            override fun onError(e: CometChatException) {
                Log.e("onErrorPN: ", e.message)
            }
        })
To fetch the registered token you can use below Firebase method.
- Java
- Kotlin
FirebaseInstanceId.getInstance().getInstanceId().addOnCompleteListener(
  new OnCompleteListener<InstanceIdResult>() {
    @Override
    public void onComplete(@NonNull Task<InstanceIdResult> task) {
      	if (!task.isSuccessful()) {
          return;
        }
      token = task.getResult().getToken();
      //CometChat.registerTokenForPushNotification(token, CometChat.CallbackListener<String>());
    }
});
FirebaseInstanceId.getInstance().getInstanceId()
   .addOnCompleteListener(object : OnCompleteListener<InstanceIdResult?>() {
     fun onComplete(task: com.google.android.gms.tasks.Task<InstanceIdResult>) {
       if (!task.isSuccessful()) {
         return
       }
       token = task.getResult().getToken()
       //CometChat.registerTokenForPushNotification(token,CometChat.CallbackListener<String?>())
     }
   })
Step 2: Setup ConnectionService.
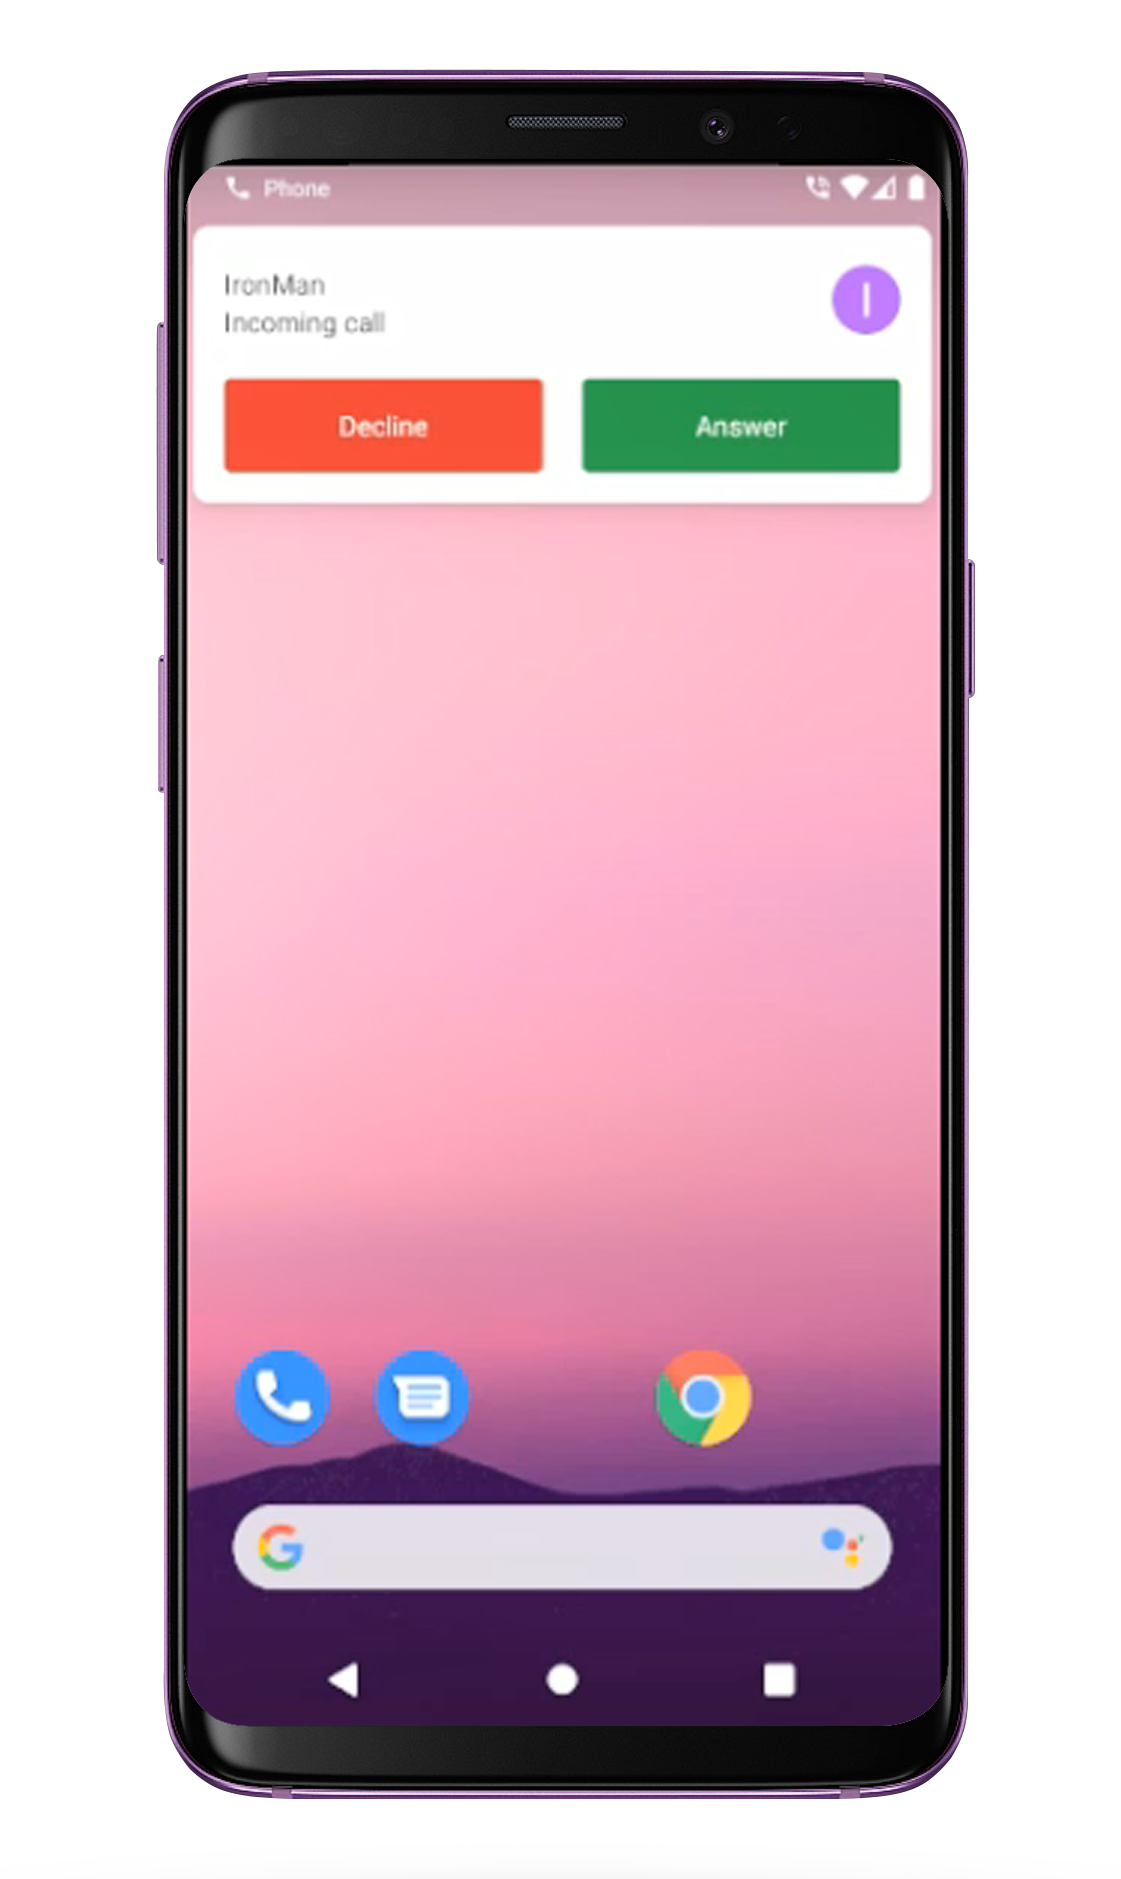
ConnectionService is an abstract service used to handle VoIP & other calls. It is part of android.telecom package which helps to handle telecom services. ConnectionService can be used either as System-Managed Service where System defined UI is shown to handle the calls. It can also be used as Self-Managed Service where users can show their own calling UI to handle the calls.
Note - Currently the sample app uses system-managed connection service, So the System UI will be displayed to handle incoming calls.
Learn more about ConnectionService.
| Files | Description |
|---|---|
| CallConnectionService.java | Custom ConnectionService file which is used to handle incoming & outgoing calls. It is used to manages the ConnectionService with your app. It also handles PhoneAccounts and bind it's services to Telecom. |
| CallConnection.java | Custom Connection class which is used to handle the callbacks of ConnectionService. Call backs such as onAnswer(), onReject(), onHold(), etc. |
| CallManager.java | It is used to manages the ConnectionService with your app. It also handles PhoneAccounts and bind it's services to Telecom. |
Step 3: Receive notifications
- The FCM Token can be received by overriding the
onNewToken()method. This token is stored as a String variable. You can choose to store it in SharedPreferences as well. - To receive messages, you need to override the onMessageReceived(RemoteMessage remoteMessage).
- PushNotificationService.java has the code that provides a way you can handle messages received from CometChat users and groups.
- Since Android O, there have been certain restrictions added for background tasks and users cannot launch intent directly from the service. More details here.
- You also need to add the above-mentioned MyFirebasMessagingService.java fil in your AndroidManifest.xml to make Push notification work in the background as well.
- XML
<service
    android:name=".MyFirebaseMessagingService"
    android:exported="true"
    android:enabled="true">
    <intent-filter>
         <action android:name="com.google.firebase.MESSAGING_EVENT" />
    </intent-filter>
</service>
Converting Push Notification Payloads to Message Objects
CometChat provides a method CometChatHelper.processMessage() to convert the message JSON to the corresponding object of TextMessage, MediaMessage, CustomMessage, Action or Call.
This code needs to be added to the onMessageReceived() method of the FirebaseMessagingService class.
- Java
CometChatHelper.processMessage(new JSONObject(remoteMessage.getData().get("message"));
Type of Attachment can be of the following the type
CometChatConstants.MESSAGE_TYPE_IMAGE
CometChatConstants.MESSAGE_TYPE_VIDEO
CometChatConstants.MESSAGE_TYPE_AUDIO
CometChatConstants.MESSAGE_TYPE_FILE
Push Notification Payload sample for text and media messages-
- Text message
- Media message
{
  "alert": "Spiderman: Text Message",
  "sound": "default",
  "title": "CometChat",
  "message": {
    "receiver": "superhero4",
    "data": {
      "entities": {
        "receiver": {
          "entityType": "user",
          "entity": {
            "uid": "superhero4",
            "role": "default",
            "name": "Wolverine",
            "avatar": "http://data.cometchat.com/assets/images/avatars/wolverine.png",
            "status": "offline"
          }
        },
        "sender": {
          "entityType": "user",
          "entity": {
            "uid": "superhero3",
            "role": "default",
            "name": "Spiderman",
            "avatar": "https://data.cometchat.com/assets/images/avatars/spiderman.png",
            "status": "offline"
          }
        }
      },
      "text": "Text Message"
    },
    "sender": "superhero3",
    "receiverType": "user",
    "id": "142",
    "sentAt": 1555668711,
    "category": "message",
    "type": "text"
  }
}
{
  "alert": "Spiderman: has sent an image",
  "sound": "default",
  "title": "CometChat",
  "message": {
    "receiver": "superhero4",
    "data": {
      "attachments": [
        {
          "extension": "png",
          "size": 14327,
          "name": "extension_leftpanel.png",
          "mimeType": "image/png",
          "url": "https://s3-eu-west-1.amazonaws.com/data.cometchat.com/1255466c41bd7f/media/1555671238_956450103_extension_leftpanel.png"
        }
      ],
      "entities": {
        "receiver": {
          "entityType": "user",
          "entity": {
            "uid": "superhero4",
            "role": "default",
            "name": "Wolverine",
            "avatar": "https://data.cometchat.com/assets/images/avatars/wolverine.png",
            "status": "offline"
          }
        },
        "sender": {
          "entityType": "user",
          "entity": {
            "uid": "superhero3",
            "role": "default",
            "name": "Spiderman",
            "avatar": "https://data.cometchat.com/assets/images/avatars/spiderman.png",
            "status": "offline"
          }
        }
      },
      "url": "https://s3-eu-west-1.amazonaws.com/data.cometchat.com/1255466c41bd7f/media/1555671238_956450103_extension_leftpanel.png"
    },
    "sender": "superhero3",
    "receiverType": "user",
    "id": "145",
    "sentAt": 1555671238,
    "category": "message",
    "type": "image"
  }
}